|
|
How to Post a Story in the Watchdog City marketplace
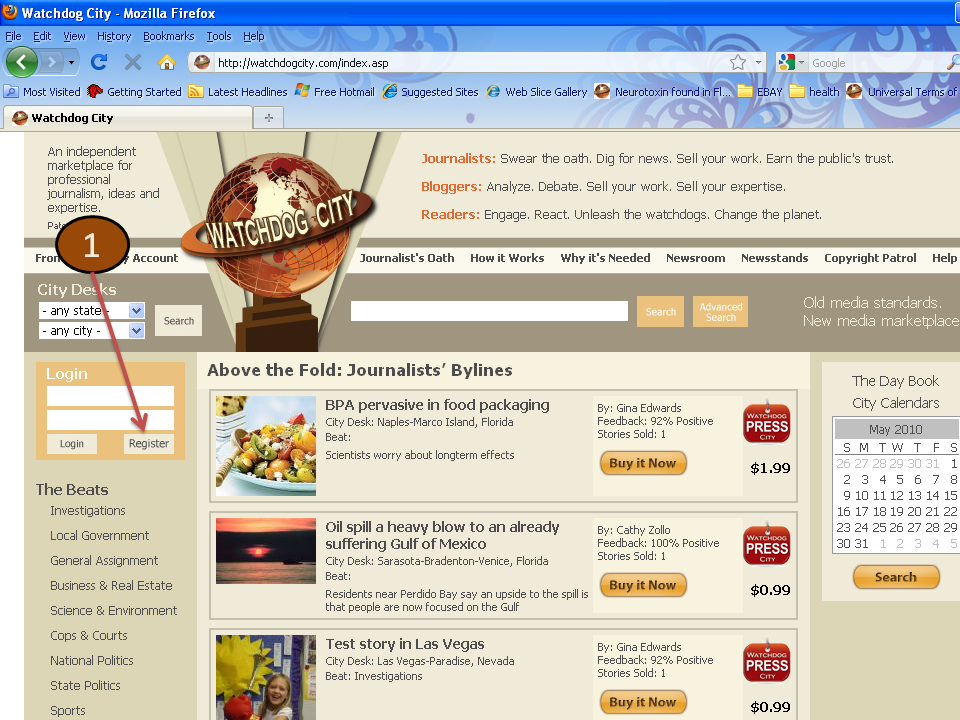 |
1. The first step to posting a story on Watchdog City is to register for an account. To do this, click on the "Register" button in the log on box.
|
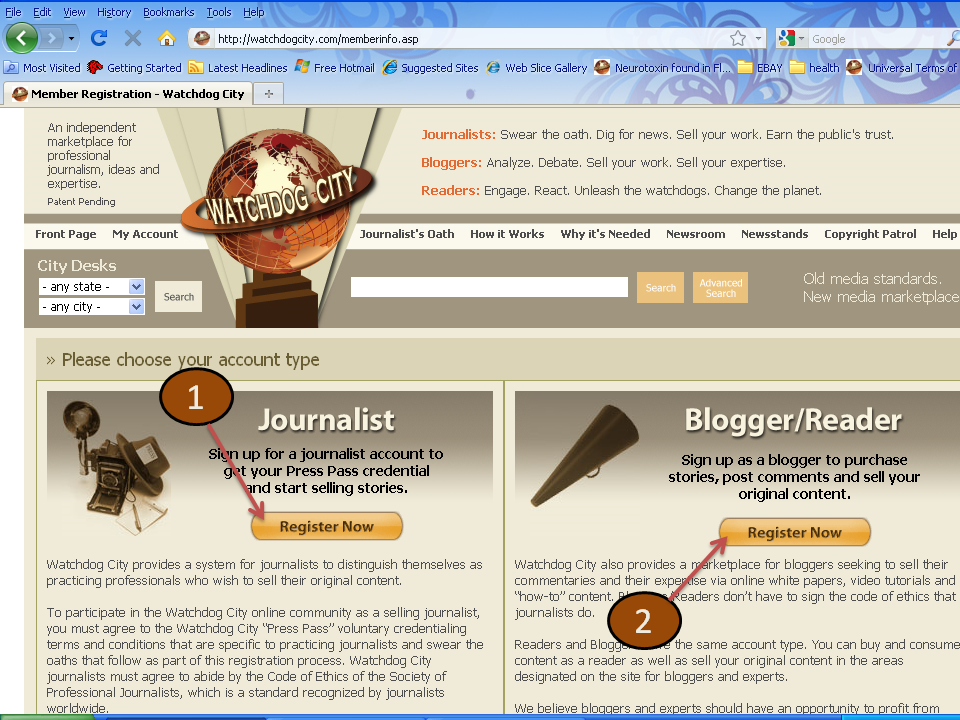 |
Chose either a Journalist or Blogger account.
1. A Journalist must abide by the Watchdog City Code of Ethics and provide up to a 10-year work history.
2. A Blogger/Reader has a similar set of standards that are less strict but still uphold standards of quality and marketplace rules.
|
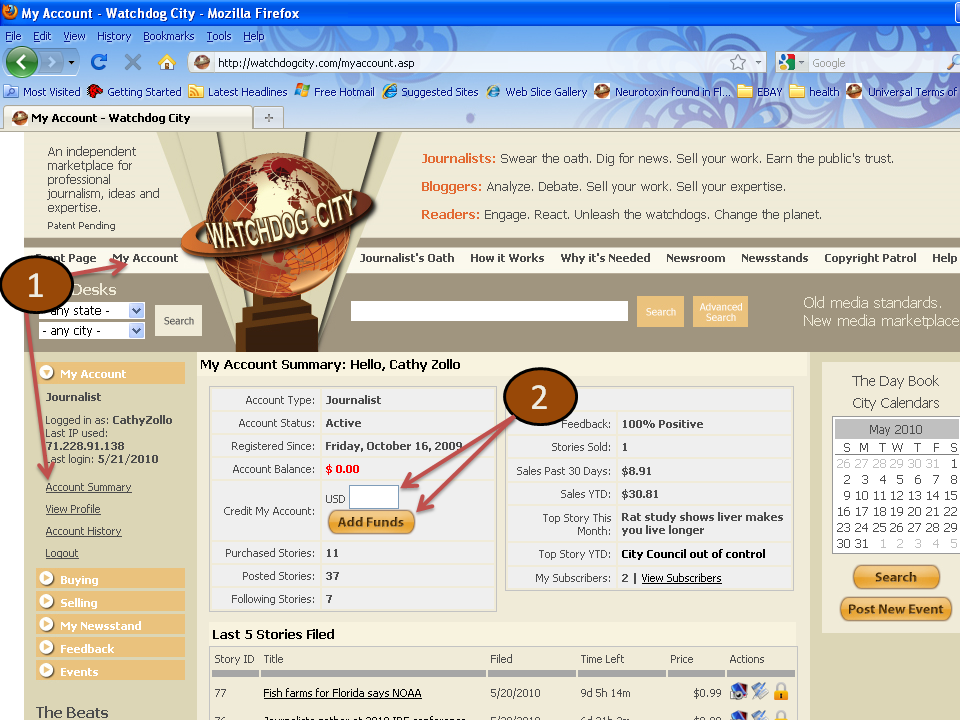 |
1. After registering and logging in, go to the account summary page, which can be found by clicking the "My Account" link in the top navigation bar or the "Account Summary" link under "My Account" in the left side menu list.
2. Add funds to your account by entering an amount in the white box and clicking "Add Funds."
|
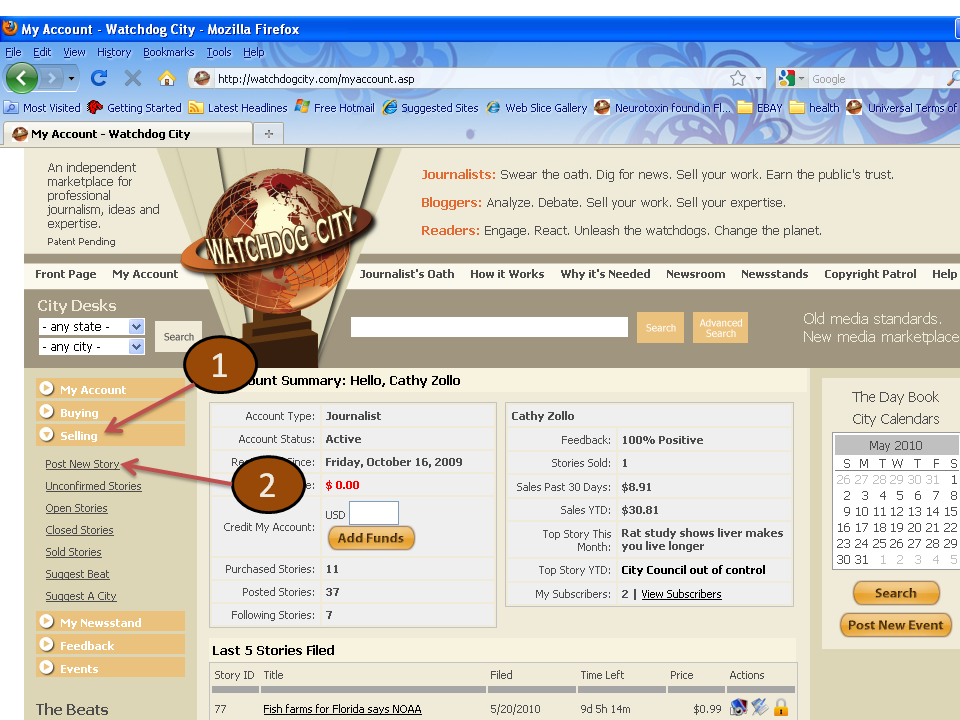 |
1. The "Selling" menu is located on the left rail. Click, "Selling," and a drop down will appear.
2. Select: "Post a new story."
|
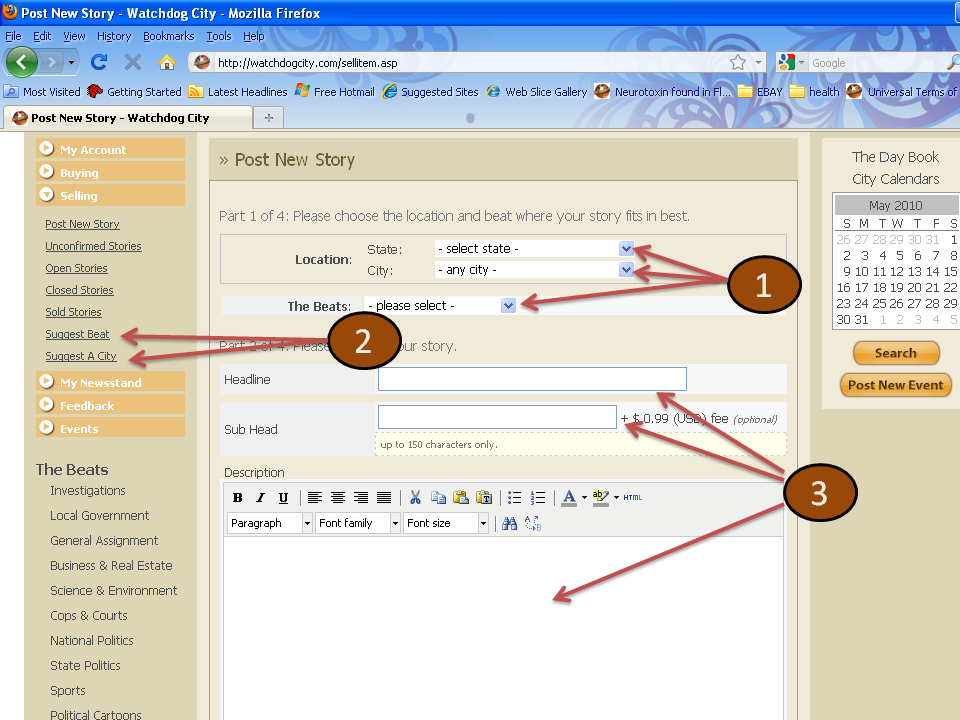 |
1. Select a state, city and beat area for your story.
2. If you don't see your city listed or a beat that is appropriate for your story, you can suggest a city and/or beat to us. We ususally get these posted within 12 hours. Or you can selected the closest city to you and "General Assignment" for your beat.
3. Write your headline and subhed as well as a description of your story.
|
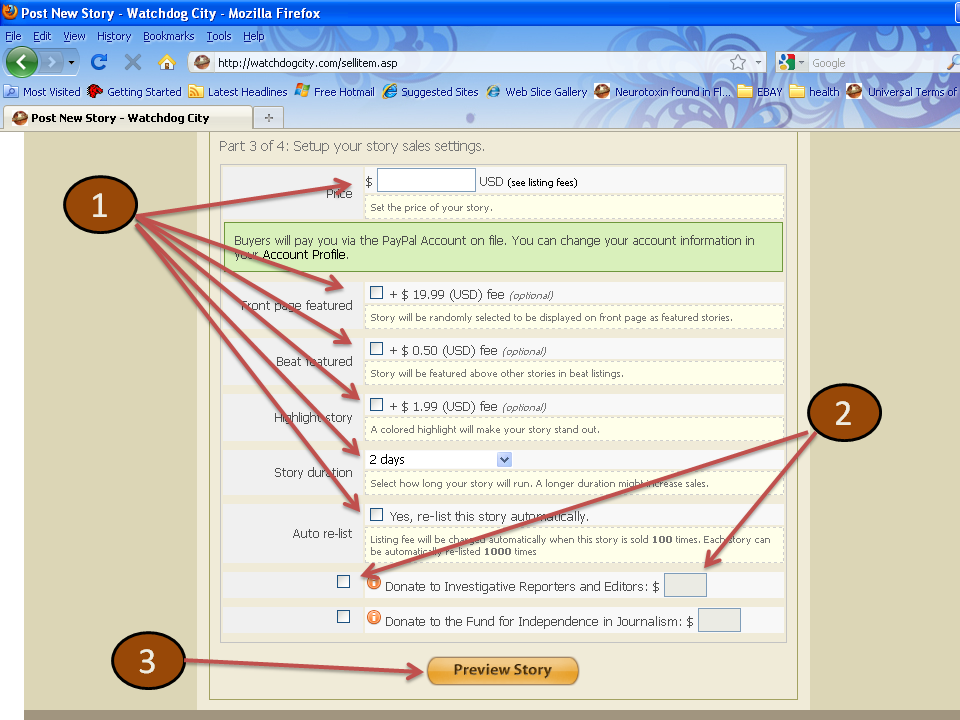 |
1. Enter a price for your story and decide on other options for the way it will appear on the Site.
2. Decide whether you want to donate to journalism friendly organizations.
3. Preview the options you have selected.
|
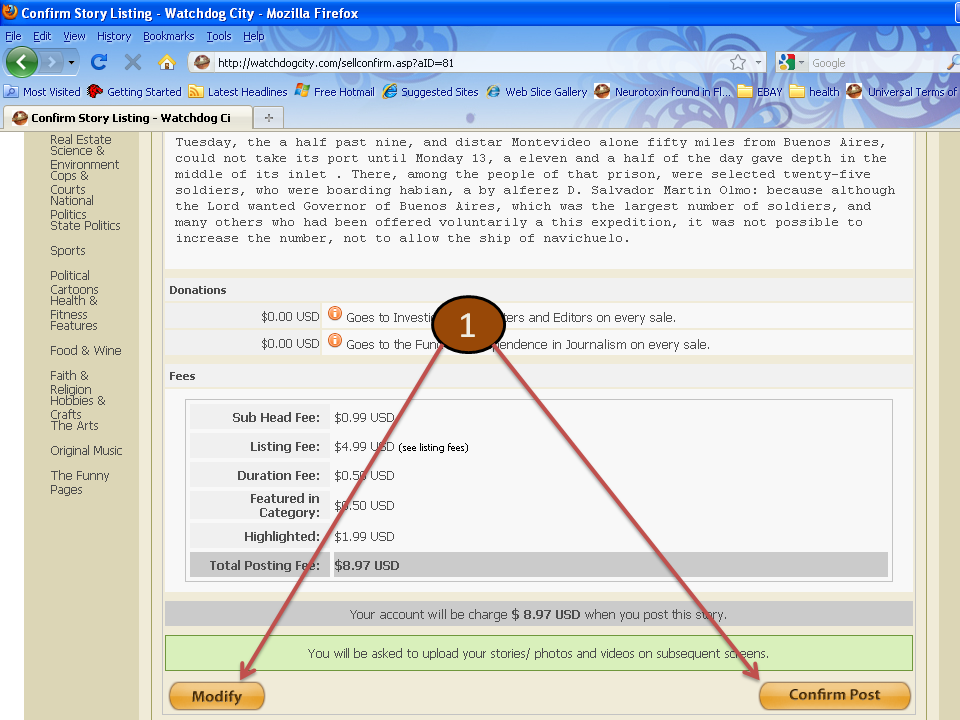 |
1. Make sure all the elements of your listing are correct. If anything needs to be changed, select "Modify," and make the appropriate changes. If all is in order, select "Confirm Post." |
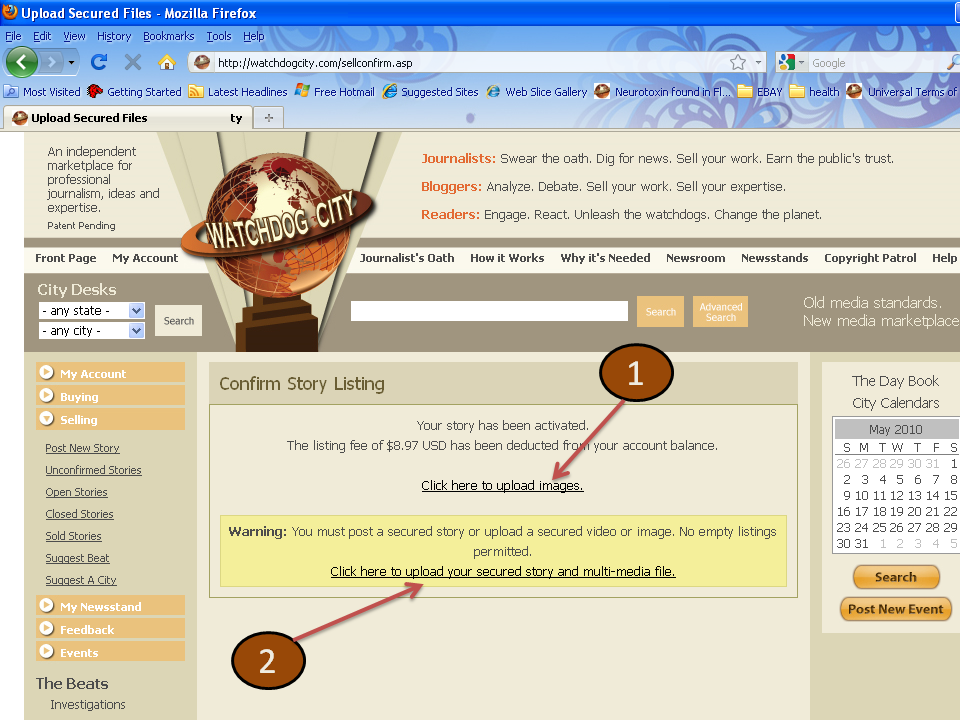 |
1. If your story has images, this is where you go to upload them.
2. If you have no images, go directly to the "Secured Files" upload.
|
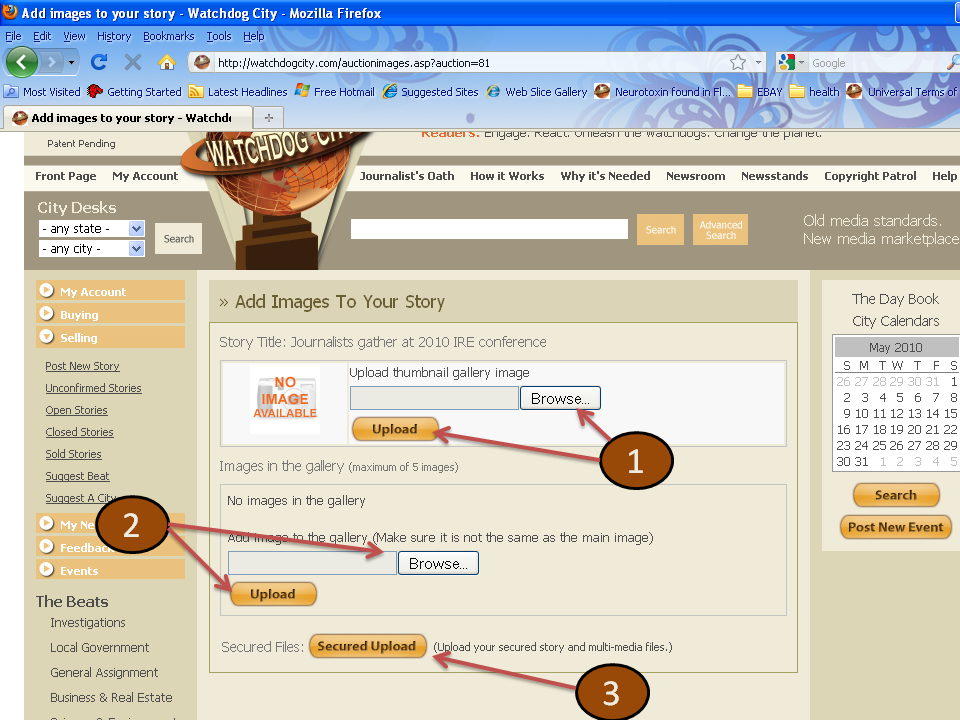 |
1. To upload an image, click the "Browse" button and select a file from your computer. Click "Upload."
2. You can add up to five more images in the gallery section by following the same process. Click "Browse," select the file and click "Upload."
3. When your images upload is complete, select "Secured Upload" to add text, video and audio files to your story.
|
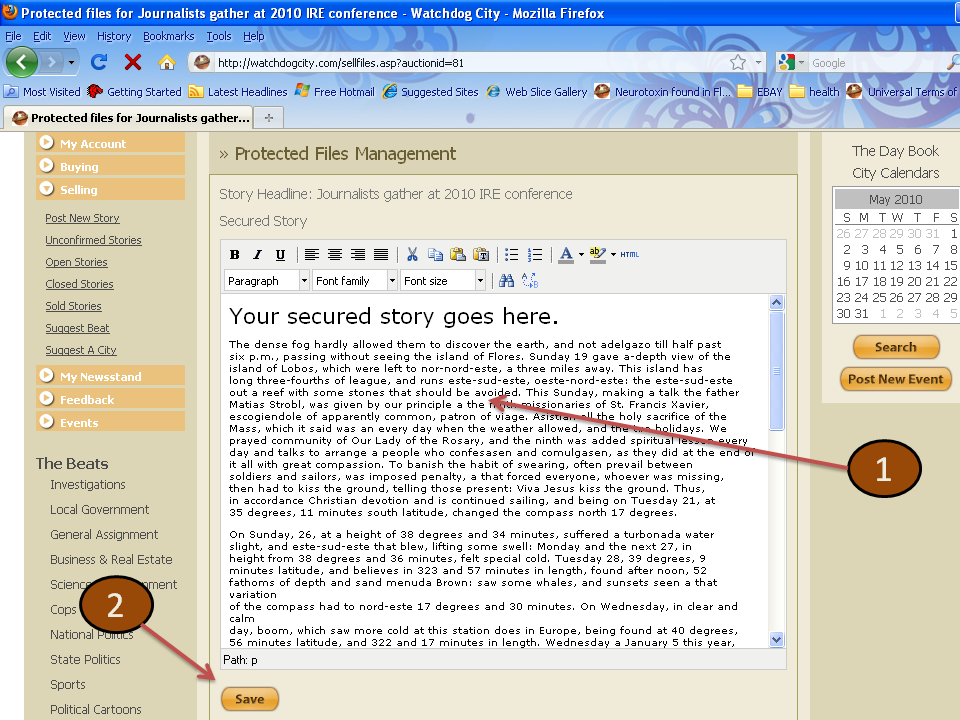 |
1. Add your secured story in the WYSIWYG.
2. Select "Save."
|
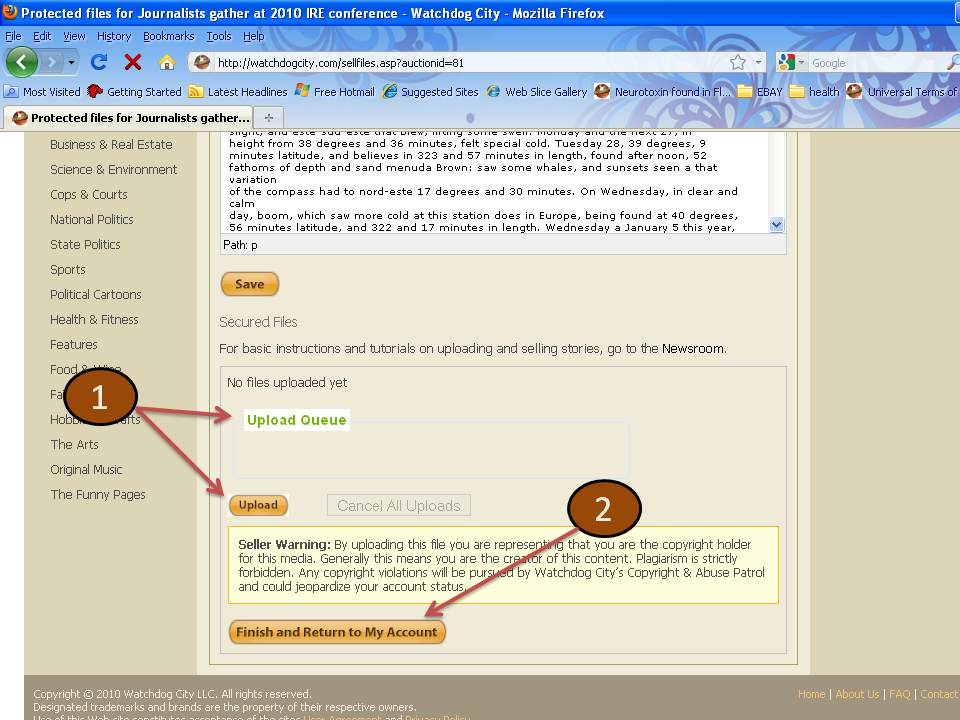 |
1. Upload your video and audio files by selecting "Upload Queue." Select the files you want to upload and select "Upload."
2. Selected "Finish and Return to My Account."
|
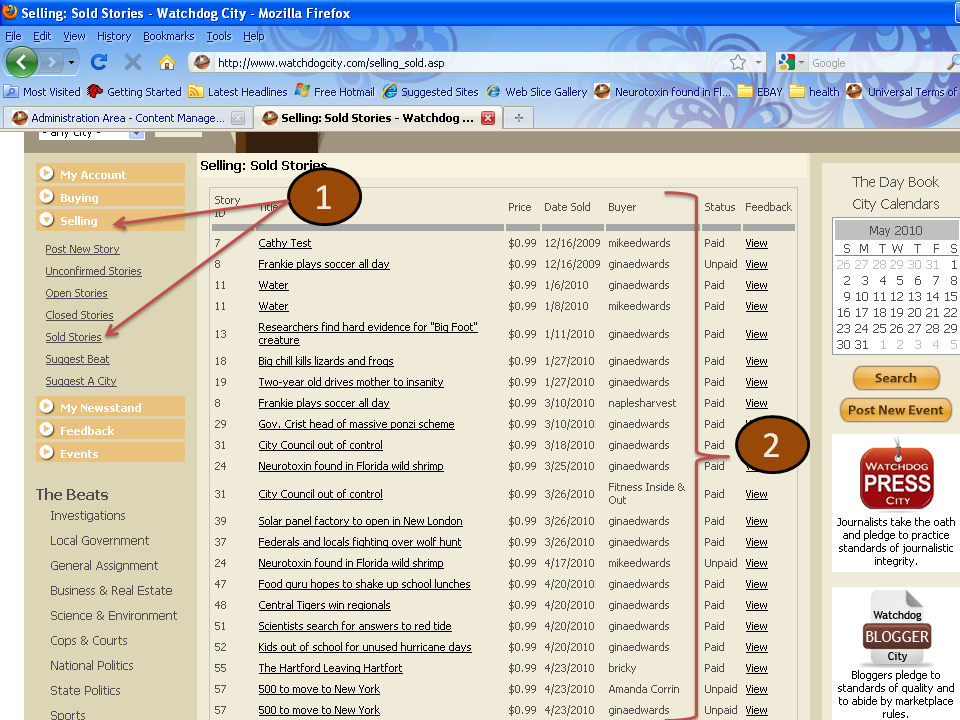 |
1. To track your sales, click on the "Selling" menu on the left rail and select "Sold Stories."
2. The stories sold list will tell you which stories have sold, who bought them, how much they paid as well as linking to the buyer's feedback on the story.
|
|
City Calendars
 |
July 2025 |
 |
| S |
M |
T |
W |
T |
F |
S |
| 30 |
31 |
1 |
2 |
3 |
4 |
5 |
| 6 |
7 |
8 |
9 |
10 |
11 |
12 |
| 13 |
14 |
15 |
16 |
17 |
18 |
19 |
| 20 |
21 |
22 |
23 |
24 |
25 |
26 |
| 27 |
28 |
29 |
30 |
31 |
1 |
2 |
|
Search

|

